How to Access Windows Shared Folders on Chromebooks
To bring Windows users into the Chromebook fold, Google is incorporating many useful features into Chrome OS. Recently, they brought network file sharing through SMB (Server Message Block) into the stable channel of Chrome OS. What it means is that you can seamlessly access network files and folder without switching to Developer mode or Canary channel. So in this article, I am going to show you how to access Windows shared folders on Chromebooks along with some helpful explanation on Windows network file sharing system. With all that said, let’s go through the guide step by step.
Access Windows Shared Folders on Chromebooks
Find the Network Share Path on Windows PC
Before we begin, we have to find the share path on our Windows PC. Unlike Windows where you can just enter the credentials and connect with other computers, in Chromebook you will have to provide the IP address in proper SMB protocol. Also, this is a one-time process and you will not have to do this for every folder sharing. So now, let’s go ahead and find the network share path without any delay.
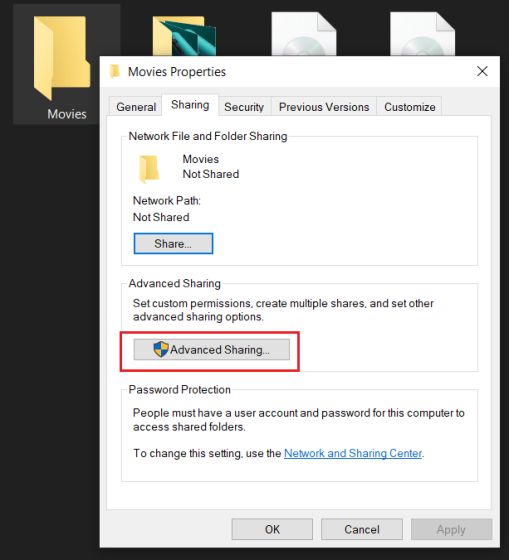
–> First of all, right-click on the Windows folder that you want to share with your Chromebook and open Properties. Move to the “Sharing” tab and click on “Advanced Sharing”.
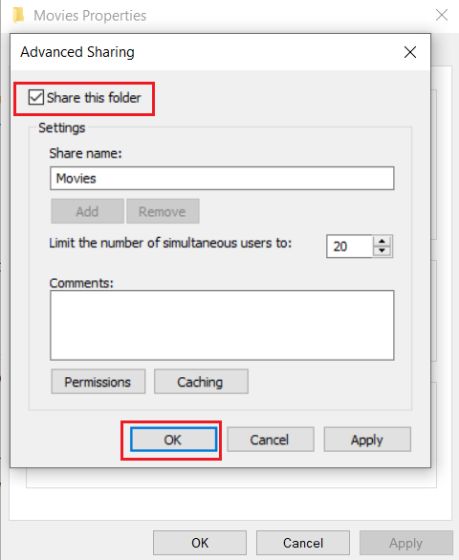
–> Next, enable the checkbox for “Share the folder” and click on the “Ok” button. Note the folder name as it will be used in the network path.
Note: Try to keep the folder name as one word to prevent any ambiguity in the file path.
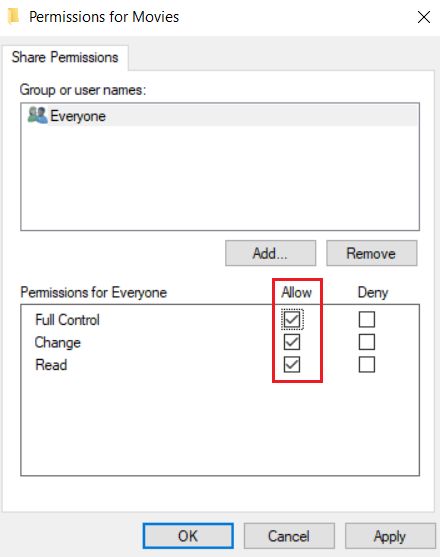
–> If you want, you can allow read, write and delete privileges as well by clicking on the “Permissions” button. Basically, this will give you full control over the Windows folders on your Chromebook.
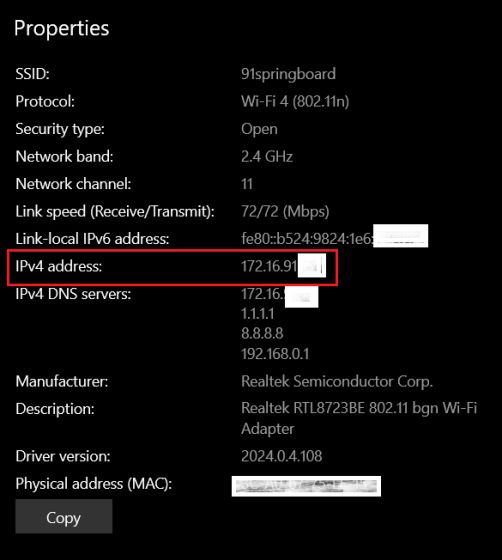
–> Now, you have successfully shared a folder that can be accessed on Chromebook through a common network. Now we need to find the IP address of the Windows PC. Click on the WiFi or Ethernet icon on the Taskbar and open Properties of the common network.

–> Now, scroll down and note down the “IPv4 address”.
–> Now that you have collected all the required information, this is how your network file path will look like.
smb://Your PC IP Address/Shared Folder Name
Here’s an example:
smb://172.16.91.151/Movies
In case, you want to connect to a Windows drive then just enter the shared drive letter in place of the folder name.
smb://172.16.91.151/D
Now that you have got the idea of network sharing path, let’s move to Chromebook for some action.
Connect Windows Shared Folders to Chromebooks
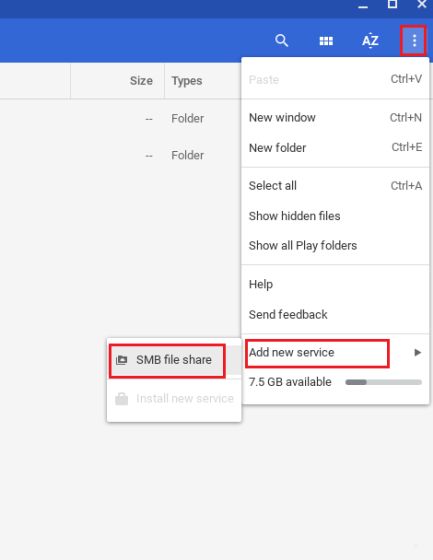
–> Open the Files app on your Chromebook and click on the 3-dot menu on the top-right corner. Next, click on “Add new service” and open “SMB file share”.
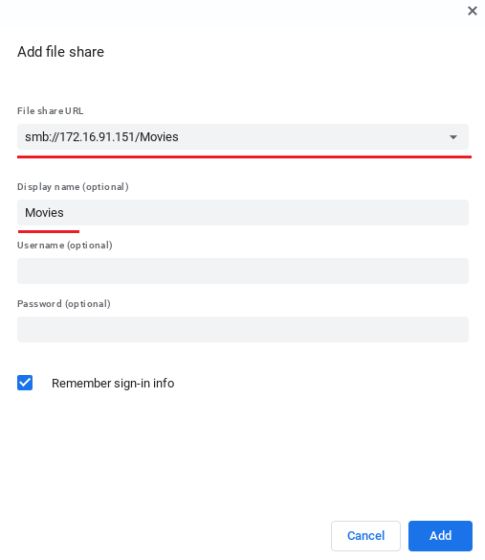
–> Under “File share URL”, enter the network share path of the folder that we got from the above section. And under “Display Name”, rename it to the folder name just for the convenience.
–> Next, enter the username of your Windows account and password. And in case, you are using an online Microsoft account on your Windows PC like me then you will have to provide the Microsoft credentials. Keep in mind, you can’t enter the PIN code in the password field.
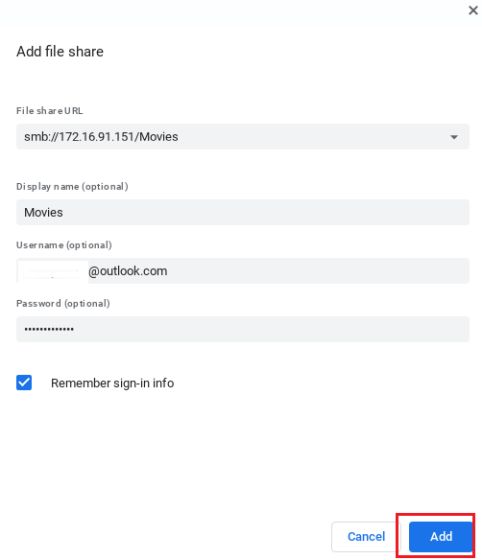
–> After that, click on the “Add” button and voila, the Windows shared folder will be live on your Chromebook with all the files within. You can access it from the left pane just like any other folder on your Windows PC.
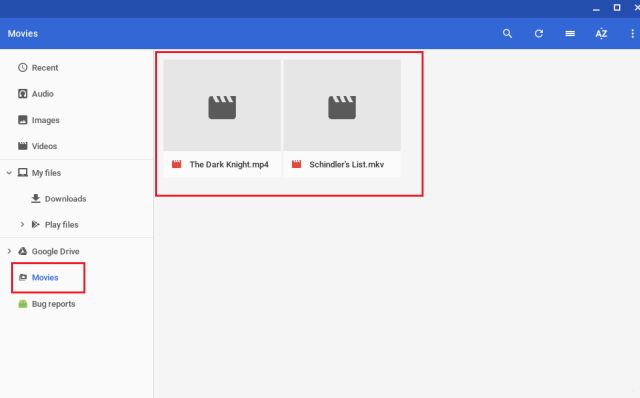
That was quite easy, right? So, if you want to share another folder to Chromebook then just repeat step #1 and #2 from the first section and enter the folder name along with the IP address on your Chromebook. That’s it. Browse your Windows files on Chromebook just like that!
Access Windows Shared Folders on Chromebooks in a Breeze
So that was our short guide on how you can access network shared folders from Windows PC to Chromebooks. As we can see, the process is quite straightforward and easy. All you have to do is, find the IP address and share the folder with the SMB protocol. I hope this guide helps you move from the old Windows PC to a new Chromebook. You should also checkout our guide on sharing files between a Windows PC and Mac. Anyway, that is all from us. If you liked this article and want to see more Chrome OS-related tips and tricks, do let us know in the comment section below.